
Getting Started with TimePlan.me
This article is your first introduction to the system. After reading it, you will understand what TimePlan consists of, where everything is located, and how to create your first appointment. Each topic is covered in more detail in a separate article, with links provided throughout this guide.
What TimePlan Is
TimePlan is an online appointment booking system. It replaces paper appointment books, the administrator's notebook, and messages such as “Can I book for tomorrow?”: the schedule is managed in an electronic calendar, clients book online, and the system automatically reminds them about their visits.
The system is suitable for any appointment-based business or professional:
- beauty salons, hair salons, and nail technicians;
- fitness clubs, personal trainers, and yoga studios;
- medical offices, dental clinics, and massage therapists;
- tutors, lawyers, psychologists, and photographers;
- rental of halls, saunas, equipment, or anything else booked by the hour.
What TimePlan helps you do:
- manage schedules — all appointments are kept in one calendar that is accessible from any device;
- accept online bookings — clients can book on their own, around the clock, without calling;
- maintain a client database — contacts, comments, visit history, and no-shows;
- send reminders — SMS, e-mail, and push notifications for clients and administrators;
- monitor operations — reports on visits, services, and staff utilization.
There is nothing to install: the system works in a browser on both computers and phones.
How the System Is Organized
TimePlan consists of several main building blocks. Understanding how they relate to one another is half the work of learning the system.
- Company — your account as a whole: its name, address, and online booking page. In our example, it is “Fitness Center.”
- Calendars — the schedules where appointments are recorded. A calendar can represent a specialist (“Emily Carter — yoga”) or a resource (“Main hall,” “Massage room”). A company can have one calendar or several.
- Services — what clients book: a name, duration, and price. Services are linked to calendars: a massage therapist offers massage, while a hall offers rental time. A service can be group-based, allowing several people to book the same time slot (see the separate article “Group Classes”).
- Schedule (work schedule) — the working hours for each calendar. Appointments can be booked only during working hours.
- Clients — the database of people who book: name, phone number, e-mail, comments, and visit history.
- Appointments — individual visits: client + service + calendar + time. They are created either by an administrator or by the client through online booking.
- Notifications — automatic appointment reminders: clients are reminded about their visits, while administrators are notified about new online bookings.
The process is simple: a client books a service in a calendar at an available time, creating an appointment for which both parties receive reminders.
Main Menu
The main menu is on the left side of the administrator dashboard. Here is a brief overview of each section:
- My Calendar — the main workspace: a schedule containing all appointments. Administrators create, reschedule, and cancel appointments here. You can view one calendar or all calendars at once:
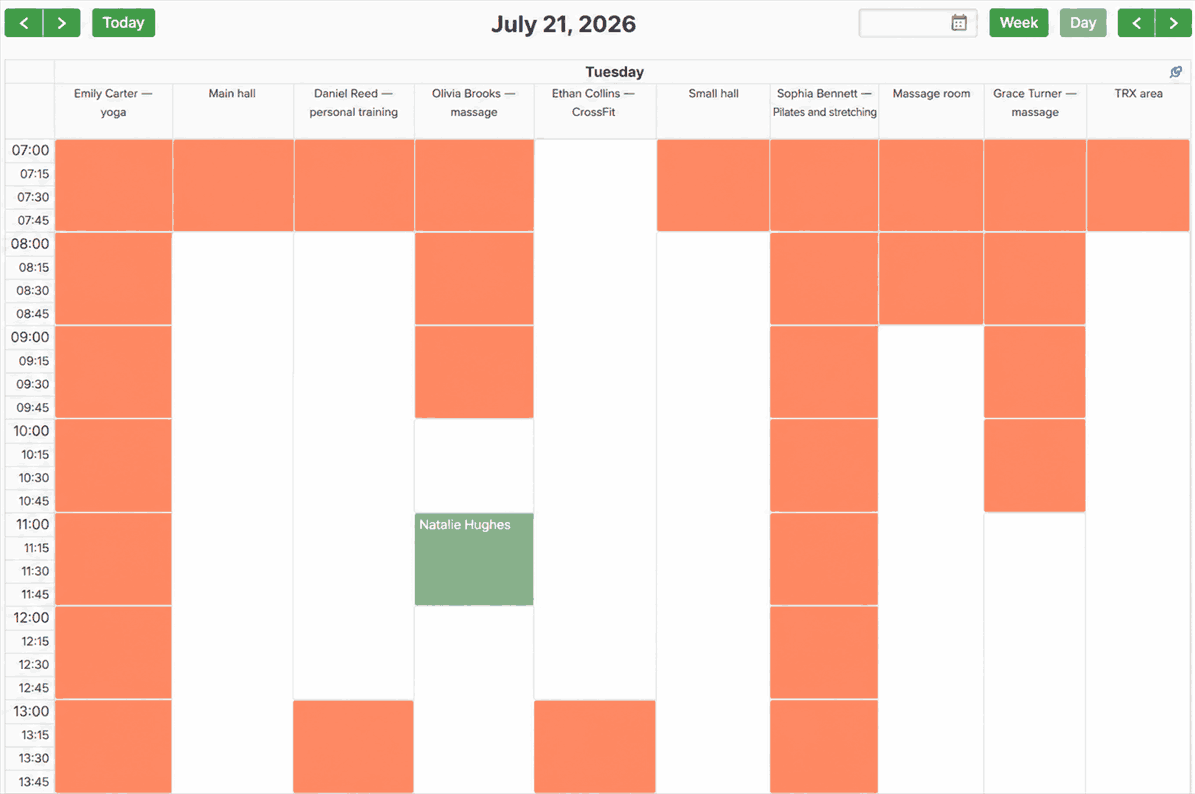
White cells are working hours, orange cells are non-working hours, and green blocks are appointments.
- Messages — conversations with TimePlan support and messages from clients.
- Finance — plan, balance, account top-ups, and a financial breakdown showing charges for appointments and SMS.
- Clients — the client database: search, client cards, Excel export, and adding new clients.
- Reports — ready-made reports: summary, visit log, service analysis, monthly trends, statistics by day, and no-shows.
- Integration — ways to connect booking to your other channels: a social media link, website widget, WordPress plugin, API, synchronization with Google, Outlook, and Yandex calendars, and online payment acceptance.
- Settings — all company settings (described below).
- Tickets — passes and memberships: you can limit clients’ online bookings to the number of visits they have purchased.
- My Appointments / Profile / Notifications — personal sections for the signed-in user: their own appointments as a client, name and e-mail, and personal notification settings.
Settings
The “Settings” section is organized as a sequence of seven steps—the same steps you completed during registration. You can move freely between them:

- Where — basic information: city, address, category, company name, and phone number. This section also contains the list of calendars, where you add new specialists and resources using the “Add calendar (specialist / resource)” button. Use it during setup and whenever a new employee joins.
- Work schedule — the schedule for each calendar: working hours by day of the week (selected with the mouse in the table or chosen from templates), schedule generation rules, and booking restrictions, such as how many hours in advance an appointment may be booked.
- Services — the services for each calendar: name, duration, price, calendar color, group booking, and additional parameter fields. This is one of the sections you will return to most often because prices and services change regularly.
- Clients — which information to request when a client books (phone number, e-mail, and whether either is required) and how the client confirms an online booking: with a code sent by phone, an e-mail code, or a simple CAPTCHA for anonymous booking. This section also includes automatic blocking for clients who miss appointments.
- Operators — employees who have access to appointment management. Each operator can be given access to all calendars or only selected calendars. Use this section when people other than the owner work with the system.
- Notifications — which reminders to send to clients and administrators and which channels to use (see “Client Reminders” below).
- Presentation — the company profile on the online booking page: company information, photos, promotions, and social media links. This is the first thing a client sees, so it is worth completing.
Creating Your First Appointment
Let us walk through a typical task: a client calls and the administrator books them for a massage. Everything takes place in the “My Calendar” section.
The sequence is: select the specialist’s calendar → find the client → select a service → choose a time → confirm.
Step 1. Find the client. There is a search field above the calendar. Start entering a name or phone number, and the system will suggest matching clients from the database:
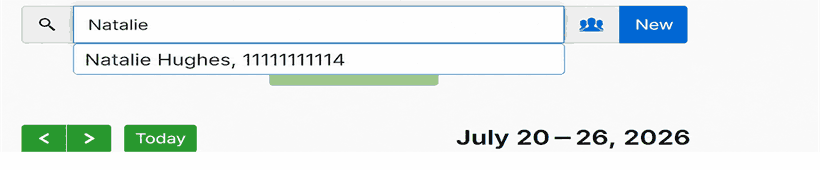
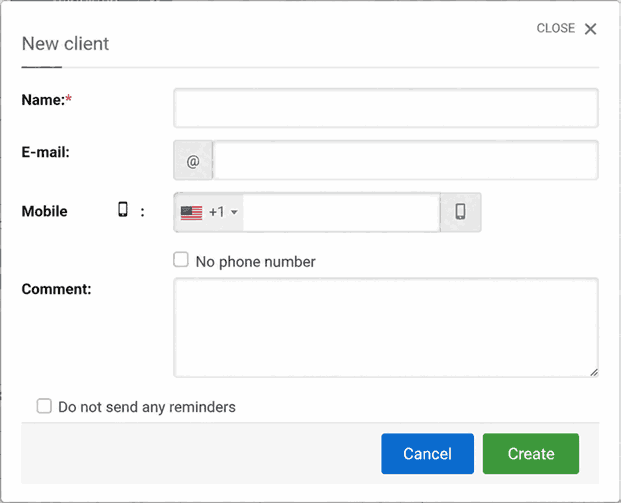
If this is a new client, click the blue “New” button next to the search field. A new client card will open; only a name and phone number are required, unless you select “No phone number”:
Step 2. Click “Book client” and select a service. After selecting a client, the green “Book client” button becomes active. Click it to display the service selector and comment field (comments are visible only to administrators):
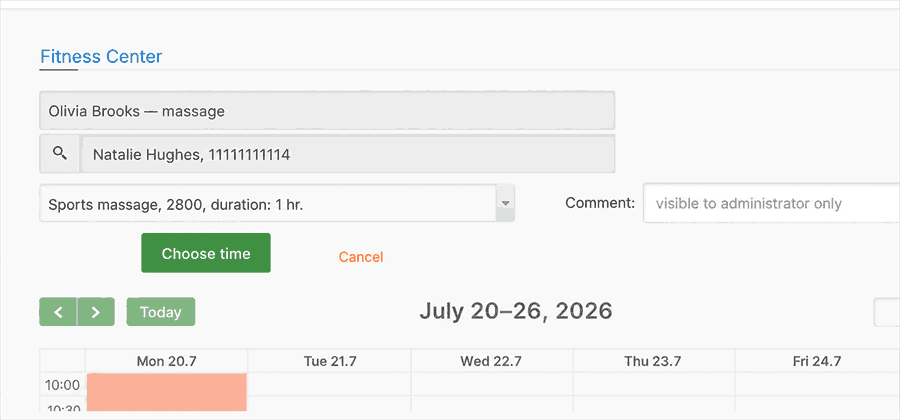
Step 3. Choose a time. Click “Choose time,” then click an available white cell in the calendar. The system displays a confirmation window with all the details:
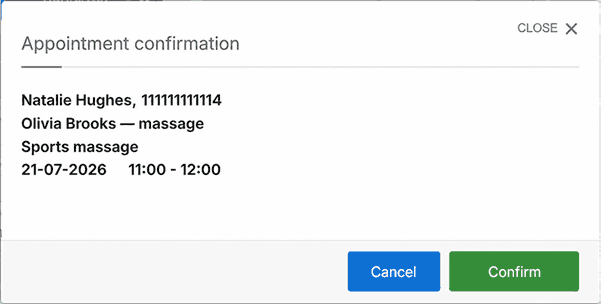
Step 4. Confirm. After you click “Confirm,” the appointment appears in the calendar:
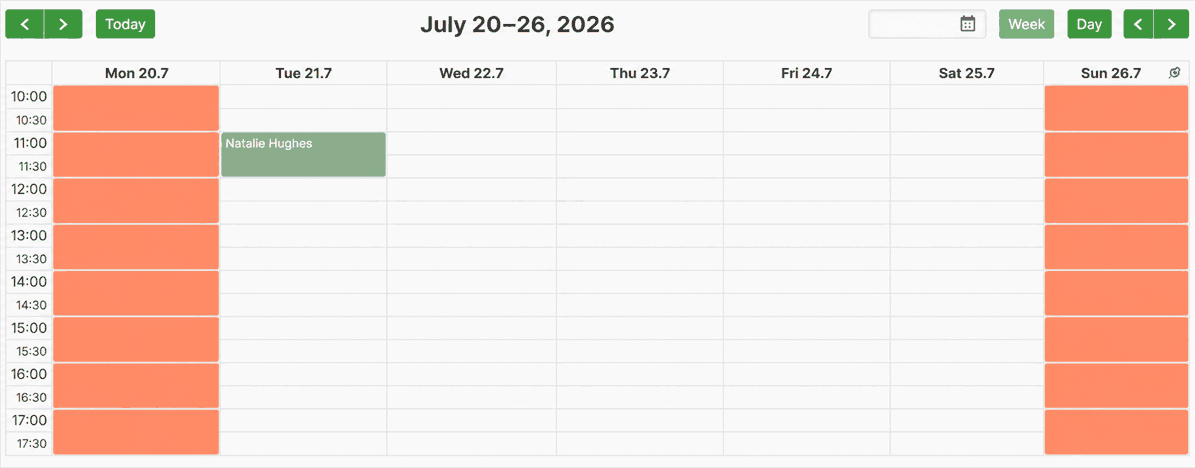
Done. Clicking the new appointment opens a menu with information, rescheduling, copying, marking the client as a no-show, and deletion.
Client Card
The client card is the client’s profile. Open it from the “Clients” section using the “Card” link in the table row, or directly from the calendar by clicking the client’s name in an appointment.
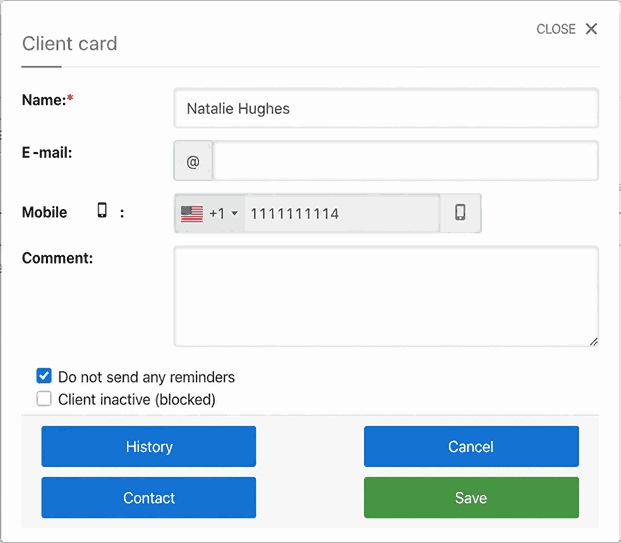
What it contains:
- Details — name, phone number, e-mail, date of birth, and photo. Everything can be edited directly in the card using the “Save” button.
- Comment — administrator notes such as “prefers morning classes” or “has back problems.” The client cannot see these notes.
- Visits / no-shows — counters for visits and missed appointments.
- Do not send any reminders — a checkbox for clients who should not be contacted by message or phone.
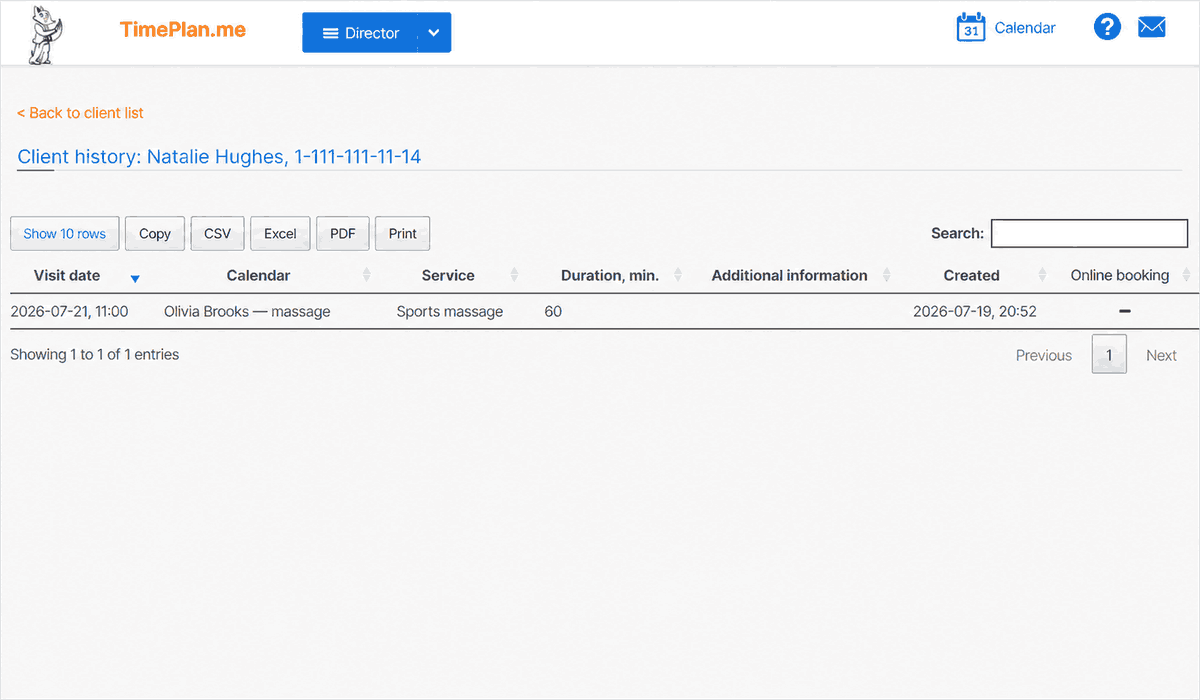
- History — the button at the bottom of the card opens the client’s full history, including past and future appointments, with dates, services, and an indication of whether each was booked online:
Online Booking for Clients
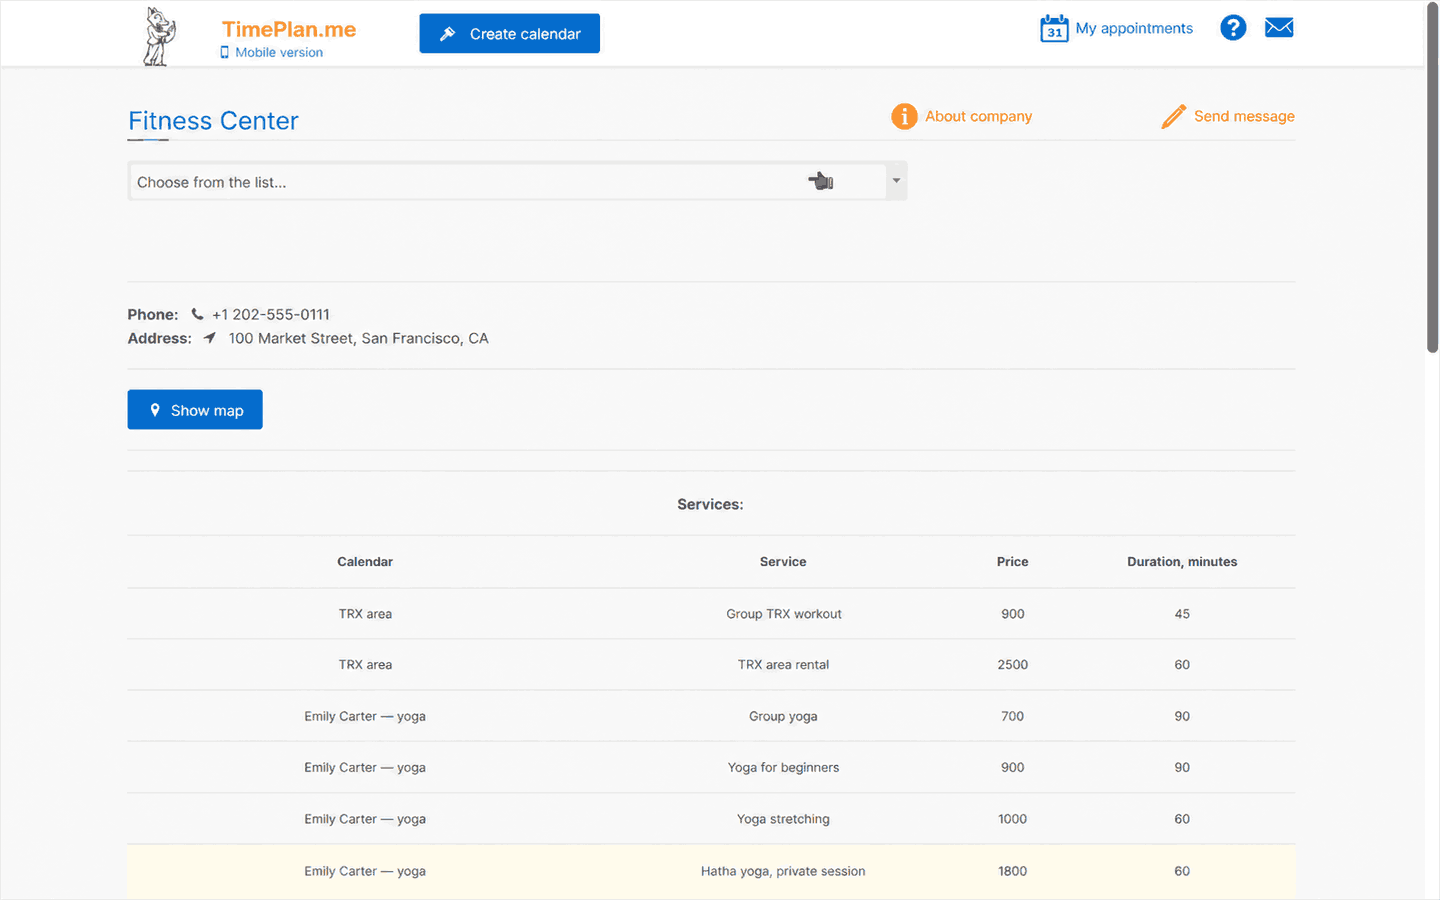
The system’s main feature is a public company page where clients can book on their own. The address is assigned during registration; for our demo company, it is TimePlan.me/fitness. You can send the link to clients, post it on social media, or embed it in your website using the “Integration” section.
The client completes four steps.
1. Opens the page and selects a specialist from the list:
2. Selects a service — the list shows prices and durations.
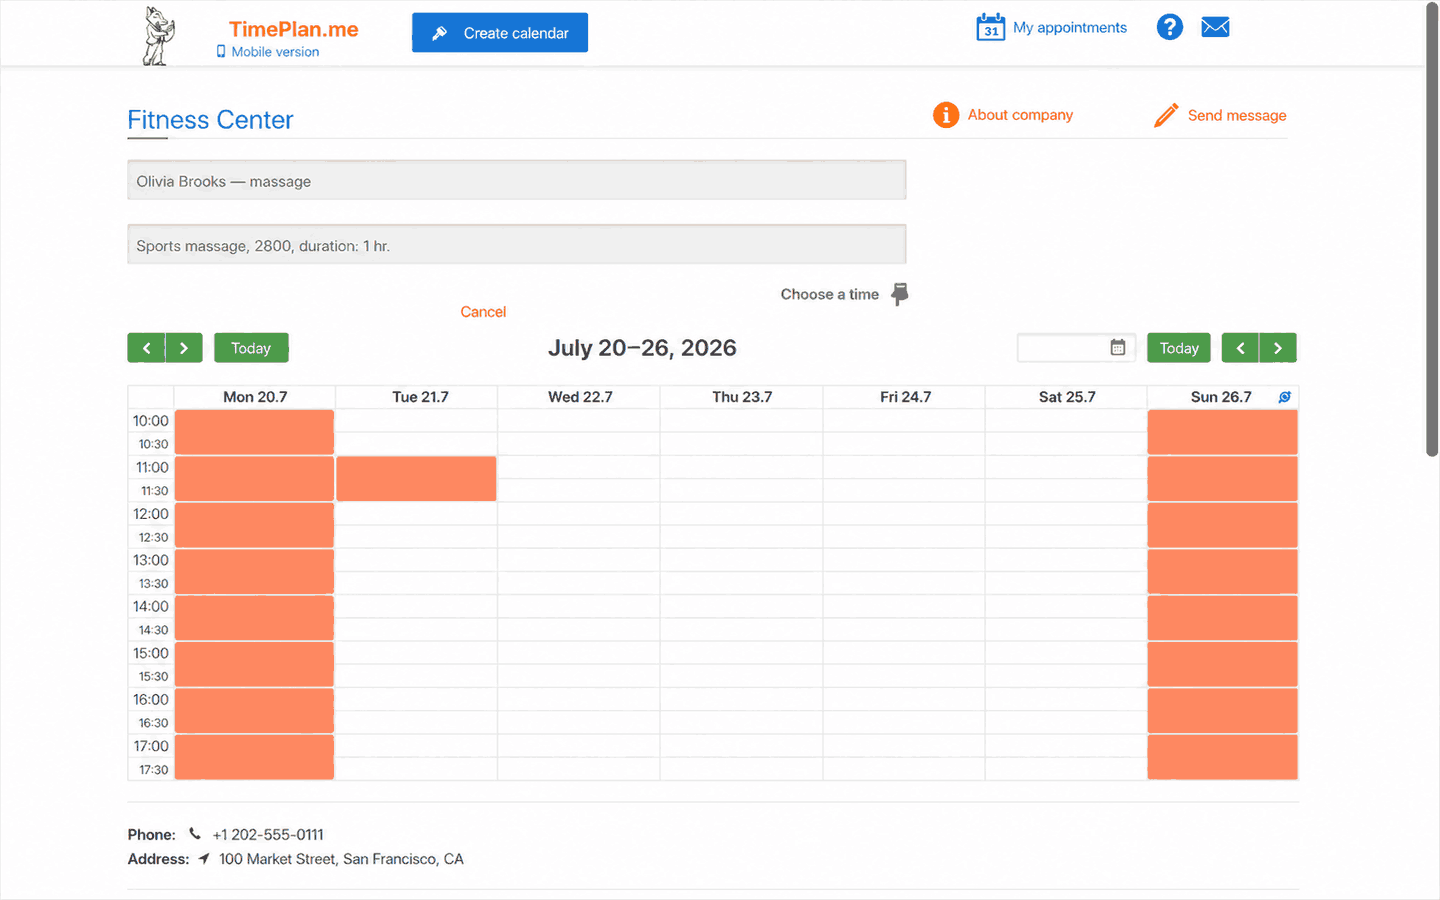
3. Selects a time. After the client clicks “Choose a time,” the page displays a week with available white cells. The client clicks the desired cell:
4. Confirms the appointment. The client identifies themselves using either a phone number and SMS code or a code sent by e-mail. These methods are configured under “Settings → Clients”:
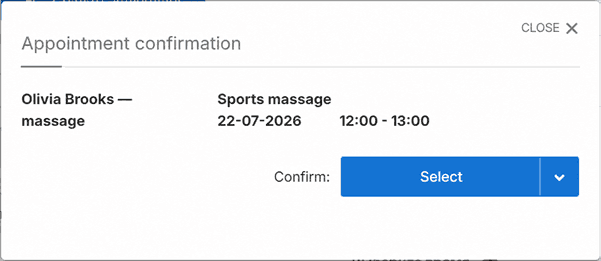
After confirmation, the appointment immediately appears in your calendar, the administrator receives a notification, and the client receives confirmation and reminders.
Client Reminders
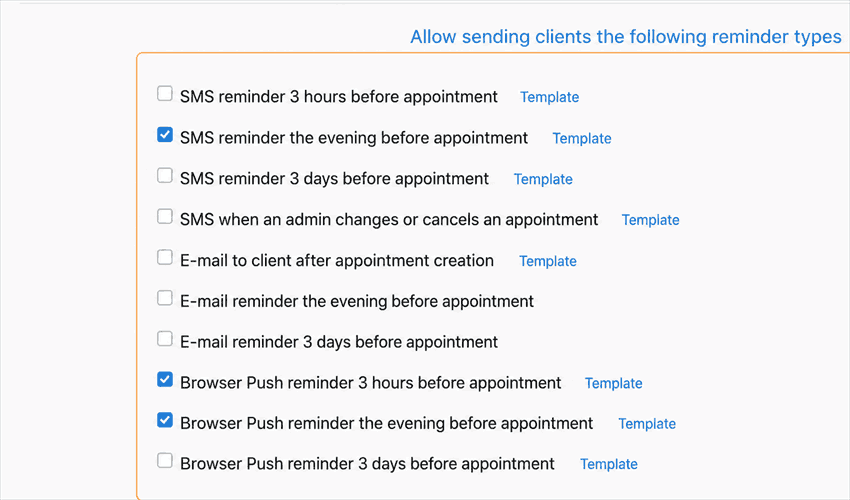
TimePlan sends appointment reminders automatically. Three channels are supported:
- SMS — standard phone reminders, sent 3 hours before, on the previous evening, or 3 days before the appointment;
- E-mail — a message after an appointment is created and reminders before the visit;
- Browser Push — free browser notifications, enabled once by the client on the booking page.
Administrators have separate notifications for new and canceled online bookings, an evening “who is coming tomorrow” summary, and low-balance warnings. SMS text can be customized using templates, and messages can also be sent through the dedicated Android app as free SMS from your SIM card.
All of these options can be enabled or disabled under “Settings → Notifications,” with one checkbox for each type.
Adding the Website to a Phone’s Home Screen
Administrators may find it convenient to keep the calendar on their phone “like an app.” Nothing needs to be installed; simply add a shortcut to the website on the Home Screen.
The mobile version of the page has a dedicated “Add to Home Screen” button:
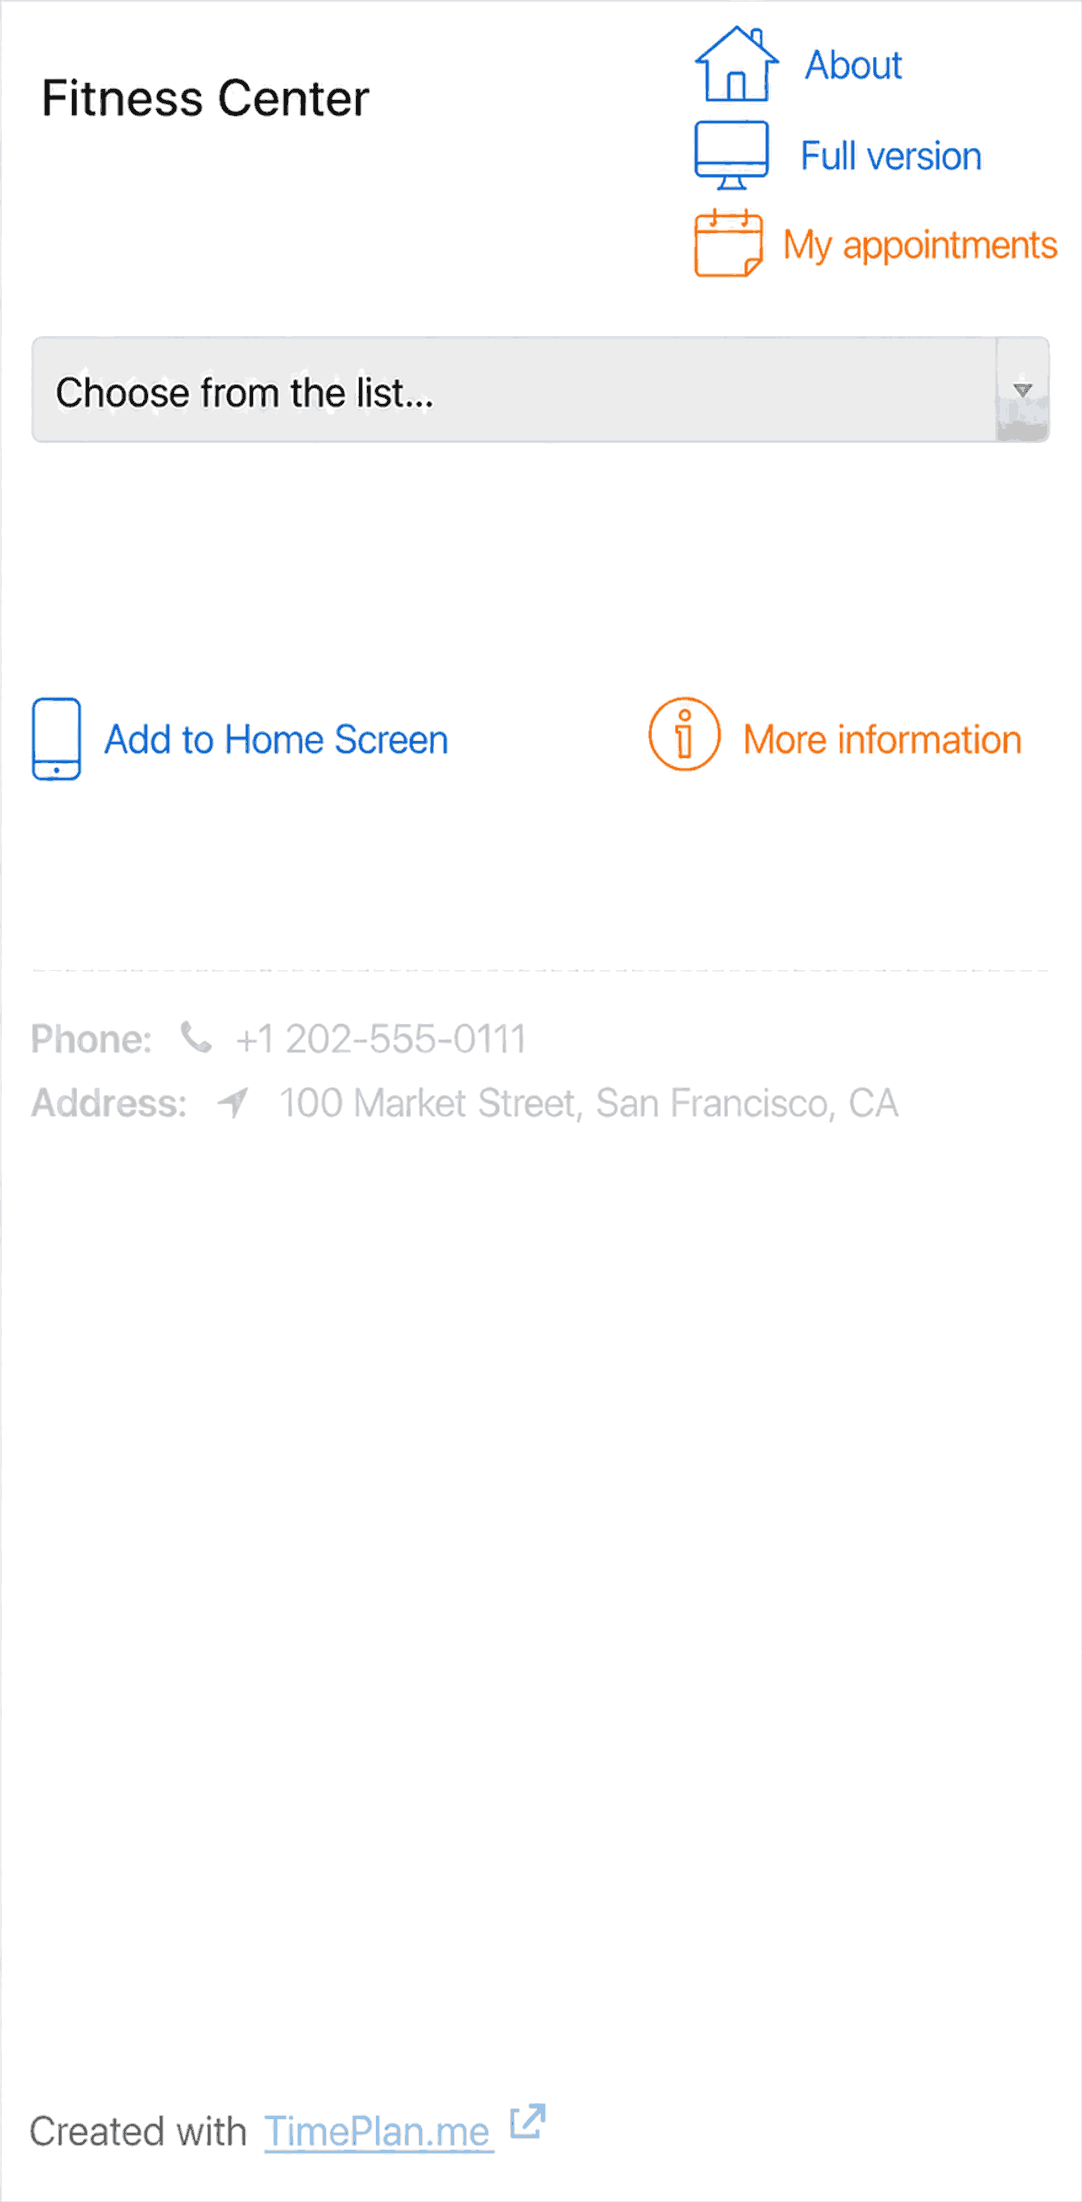
Tap it, and the system will display instructions for your browser. On Android with Chrome, tap the ⋮ button in the upper-right corner of the browser, then select “Add to Home screen”:
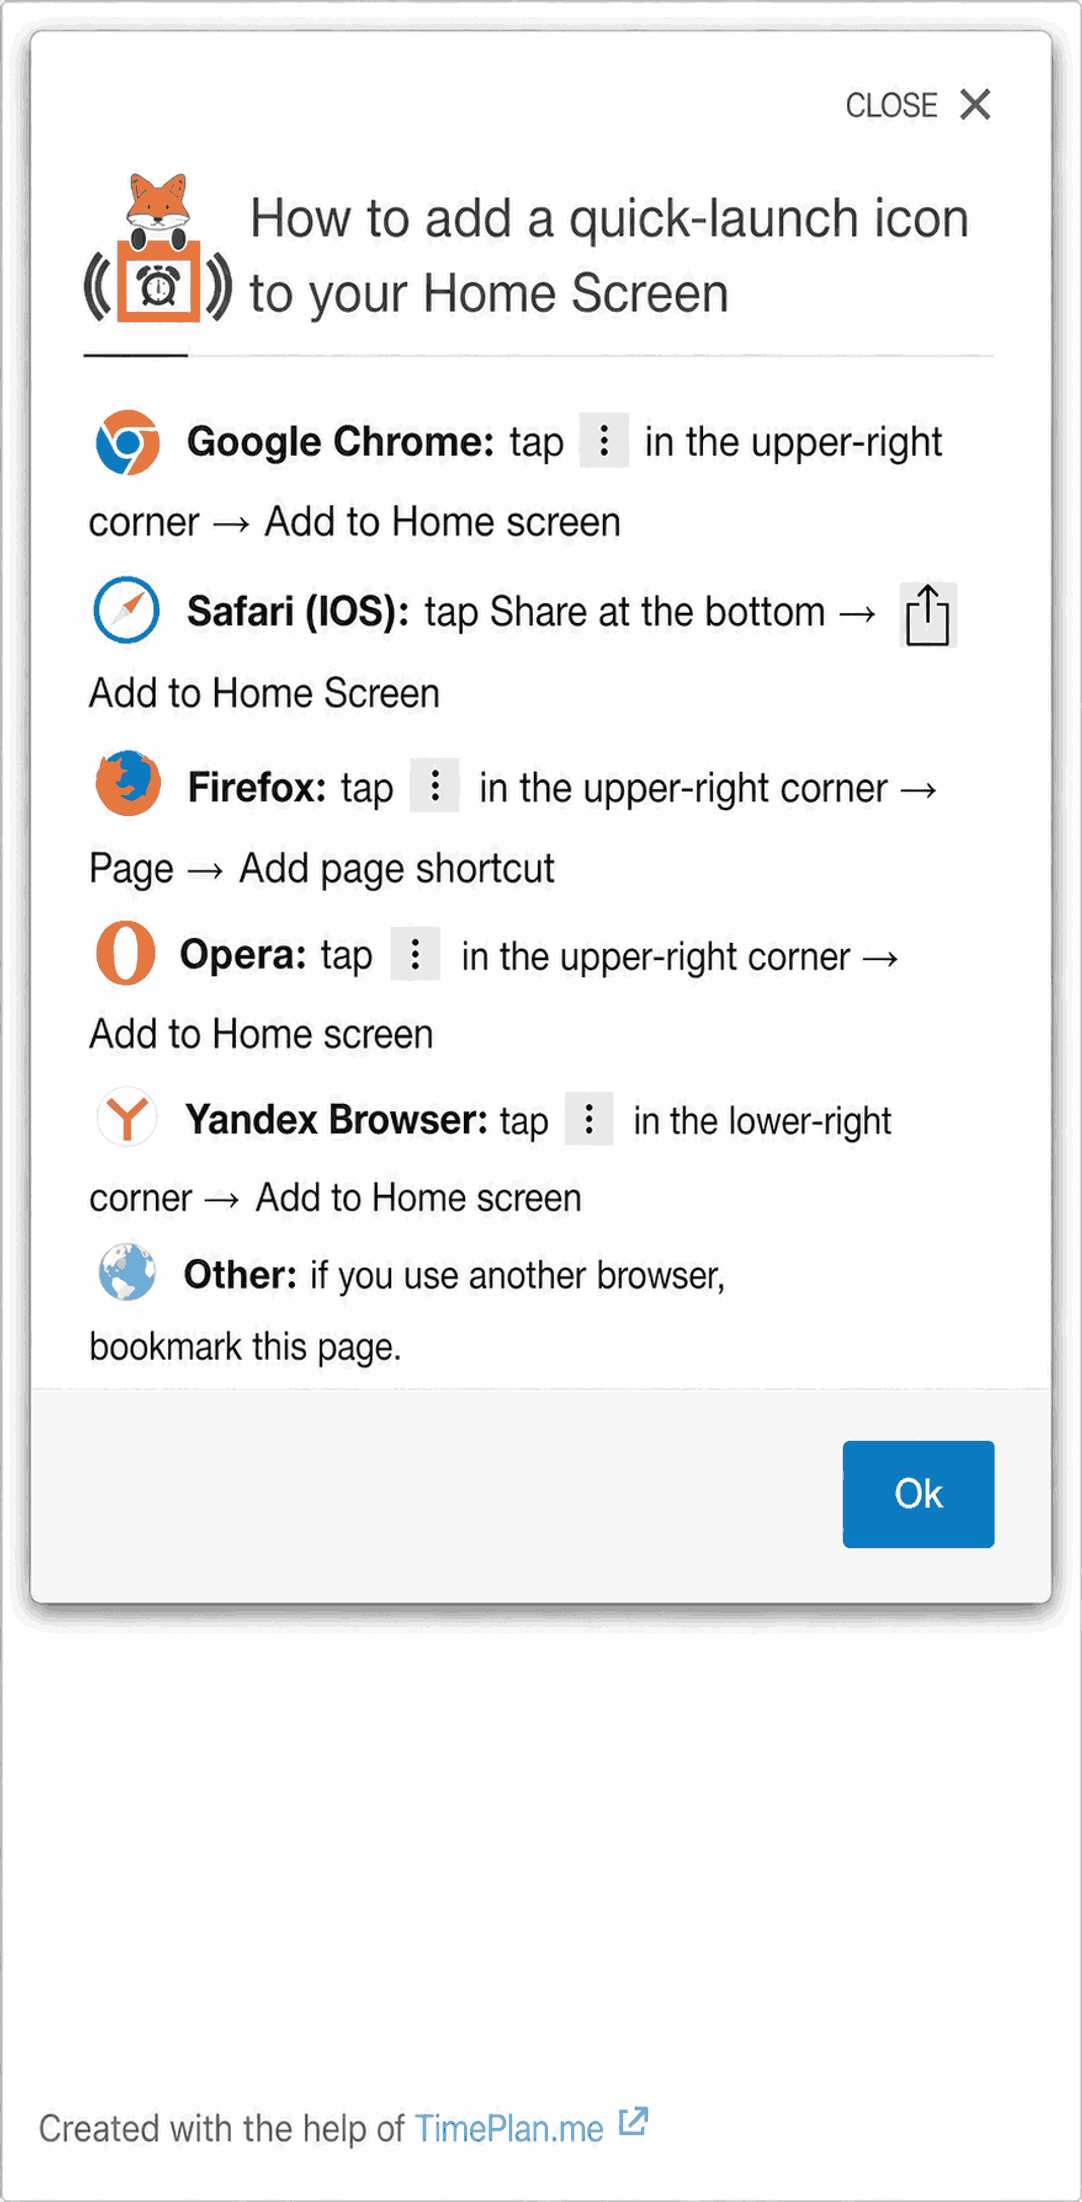
An icon will then appear on the phone’s Home Screen, and the website will open with one tap like a regular app. Clients can use the same method to pin your booking page to their phones.
Tips for New Users
Recommended setup order after registration:
- Complete “Where” — enter the company name, address, and phone number that clients will see on the booking page.
- Add calendars — one for each specialist or resource.
- Create services — use actual prices and durations, because the schedule grid depends on service duration.
- Set the work schedule for each calendar; bookings cannot be created without it.
- Review the booking page from a client’s perspective — open
TimePlan.me/your-companyin a private browsing window and try to book an appointment. - Configure notifications — at minimum, enable an e-mail after booking and an SMS reminder on the previous day.
- Complete the “Presentation” section — photos and a description build trust with new clients.
- Then connect everything else — operators, website integration, memberships, and online payments.
Frequently Asked Questions
Do I need to install a program? No. TimePlan works in a browser on both computers and phones. You may optionally install the Android app, but it is needed only to send free SMS from your SIM card.
Can I manage appointments from my phone? Yes. The mobile version opens automatically, and a Home Screen shortcut makes it work like an app. All administrator actions are also available from a phone.
Can I disable online booking? Yes, in several ways: mark a service as “Available for administrator booking only” so clients cannot see it, restrict online booking to clients with tickets or memberships, or temporarily pause the calendar under “Settings → Where.”
Can several administrators use the system? Yes. Add employees under “Settings → Operators,” then give each one access either to all calendars or only to selected calendars.
How does a client cancel an appointment? On the “My Appointments” page of the website, or through the link in the confirmation e-mail. The administrator receives a cancellation notification, and the time becomes available for booking again.
How much does it cost? There is a free plan and several paid plans. For example, “Mini” has no subscription fee and charges for each appointment created. Your current plan and balance are shown in the “Finance” section.
Next articles: “Group Classes”, “Configuring Services,” and “Online Booking and Website Integration.”