
Group Classes in TimePlan
What Group Classes Are
A standard appointment in TimePlan follows the “one time slot — one client” principle: once a time is booked, another client can no longer book it. Group classes remove this restriction: several people can book the same time slot — up to the limit you set in the service settings. Group classes are useful whenever a specialist works with several clients at once:
- group workouts at a fitness center (yoga, Pilates, CrossFit);
- workshops and seminars;
- children’s clubs and activities;
- sessions for two people (for example, a partner workout). What this gives you:
- One slot — many clients. There is no need to maintain a separate group list: all participants are visible directly in the calendar.
- Capacity control. The system automatically counts occupied spots and does not allow bookings beyond the limit.
- Client self-booking. Clients join the group through the online booking page and can see how many spots remain. In this article, we use a demo company called “Fitness Center.” Instructor Emily Carter has a group service called “Group Yoga” (90 minutes, $700, up to 20 participants).
How a Service Becomes a Group Service
A group class is always based on a group service. A service becomes a group service during the “Services” setup step. When creating the service, select “Multiple clients can book the same time” in the “Group booking” row.
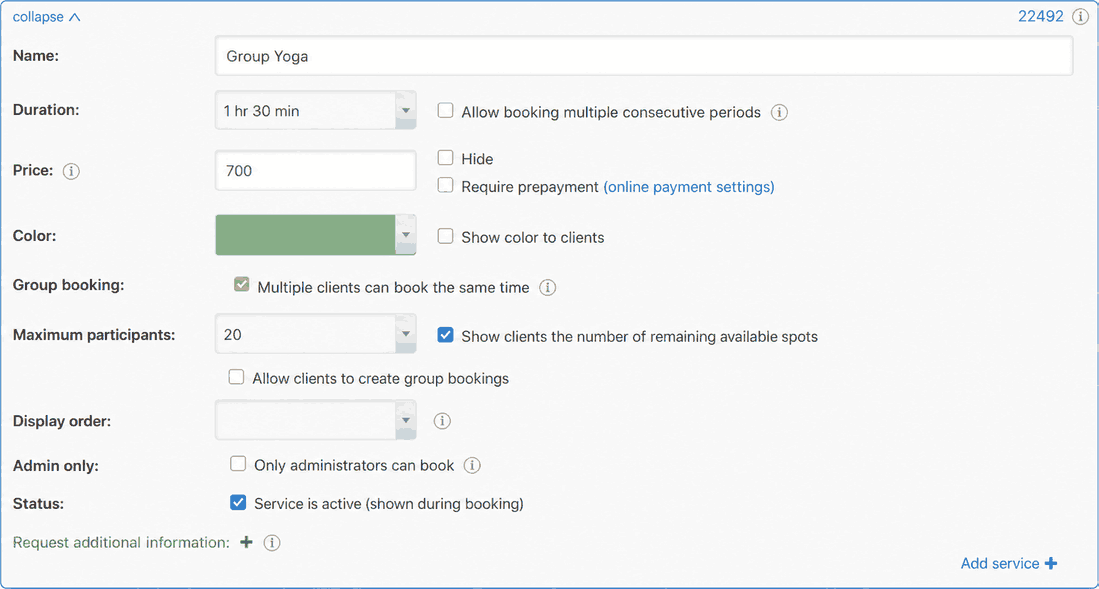
Three settings are important here:
- Group booking — the checkbox that turns the service into a group service. Note that it cannot be changed after the service has been saved, so you must decide whether the service is a group service when you create it.
- Maximum participants — the group capacity. In our example, it is 20. You can enter 2 for a partner workout or even 100 for a large hall.
- Show clients the number of remaining available spots — when enabled, clients will see “available: 16” on the booking page. This encourages them to book in advance and eliminates questions about whether spots are still available. A separate “Allow clients to create group bookings” checkbox lets clients open a new group at an available time themselves. When it is disabled, as in our example, only an administrator creates classes in the schedule, while clients simply join them.
Creating a Group Class as an Administrator
A group class is created in the company calendar (“My Calendar” menu). Select the required specialist’s calendar and switch the booking mode to “Group.” The client search will be replaced by a group service selector and an optional “Message to participants” field. You can use it for the studio address, a video meeting link, or a list of items to bring; participants will see the message before booking and in the confirmation email.
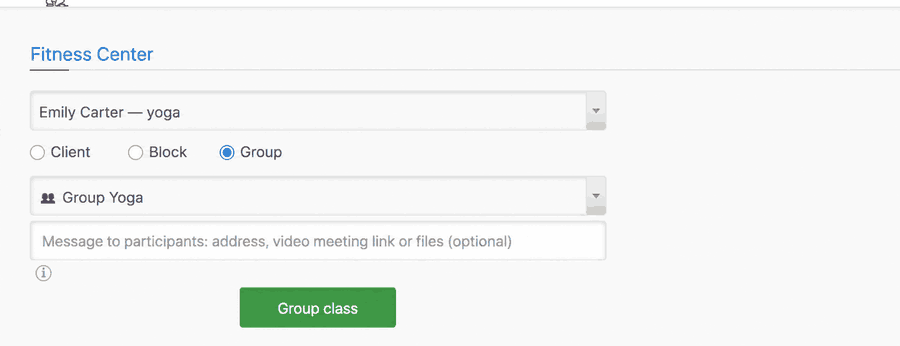
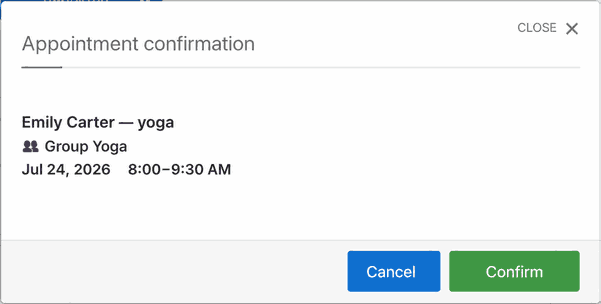
Click “Group class.” The calendar switches to time selection mode and displays the “Select a time” prompt. Click an available cell on the required day. The system displays a confirmation window with the date, time, and service:
After you click “Confirm,” the class appears in the calendar. A participant counter is displayed to the left of the service name — initially “0/20”:
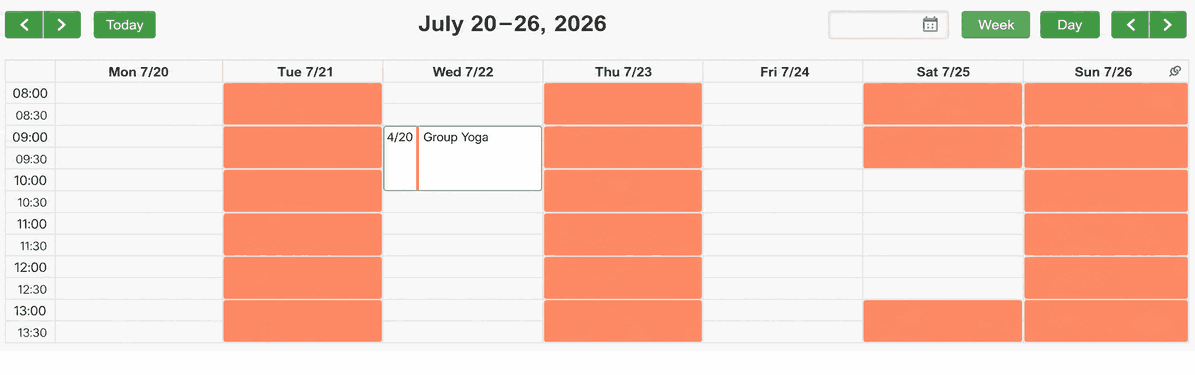
White cells are the instructor’s working hours, while orange cells are non-working hours. A group class is easy to recognize: it is a bordered block with an “occupied/total” counter. The vertical bar is a visual capacity indicator.
Viewing a Group Class
Clicking a class in the calendar opens its menu. The class time is shown in the header, with all available actions below:
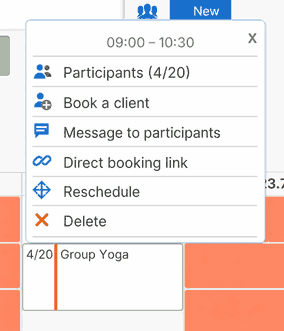
- Participants (6/20) — a list of booked clients and their phone numbers; from here, you can view booking details, remove a participant, or open the client’s profile.
- Book a client — add a participant on behalf of the administrator (see the next section).
- Message to participants — text that all booked participants will see.
- Direct booking link — a short link to this specific class; it is convenient for sending to a client in a messenger or posting on social media.
- Reschedule — move the entire group to another time.
- Delete — cancel the entire class. The “Participants” window provides a complete overview of the class: the service name, date and time, capacity counter, and list of booked clients:
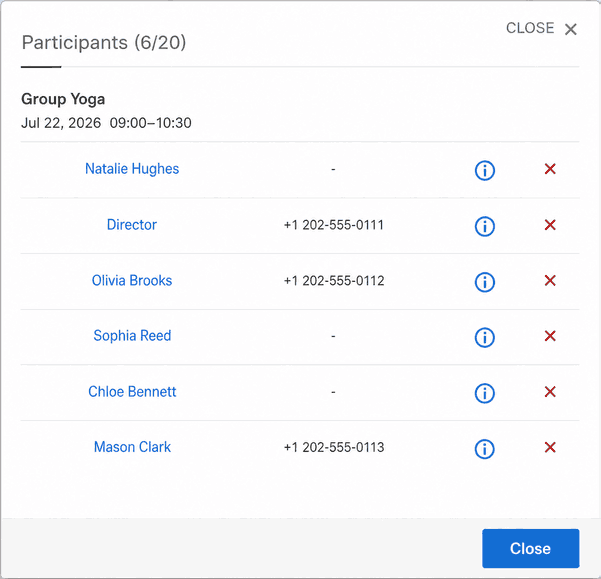
In our example: “Group Yoga,” July 22, 2026, 9:00–10:30 AM, instructor Emily Carter, 6 of 20 spots booked, and 14 spots available. Each row provides three actions:
- the participant’s name (blue link) opens the client’s profile;
- ⓘ opens the “Appointment information” window for that participant;
- ✕ removes the participant from the group (the first click asks for confirmation).
What You Can Learn About Each Participant
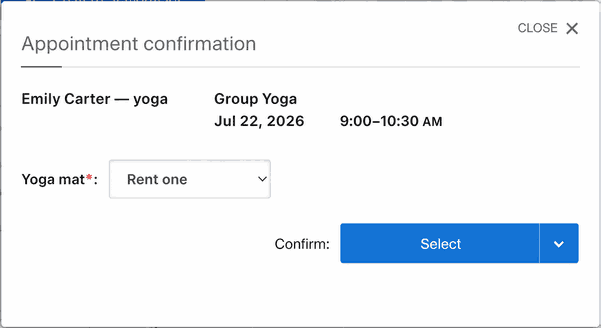
Sometimes you need additional information for a class: whether the client needs a mat, their experience level, or whether they have any health restrictions. These questions can be asked automatically using additional fields configured for the service (Settings → Services → “Request additional information”). A field can be a text string, a number, or a list of options. In our example, the “Group Yoga” service has a required “Yoga mat” field with two options: “Bringing my own” and “Rent one.” When clients book on their own, the system asks them directly in the confirmation window:
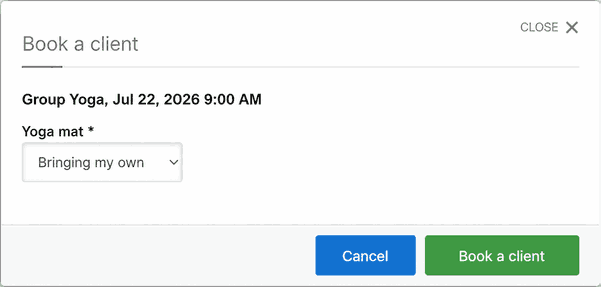
If an administrator books the client into the group, the same questions are shown to the administrator. The window appears immediately after clicking “Book a client”:
The answer is saved with the booking. To find it, open the “Participants” window and click ⓘ in the required person’s row. The “Appointment information” window opens:
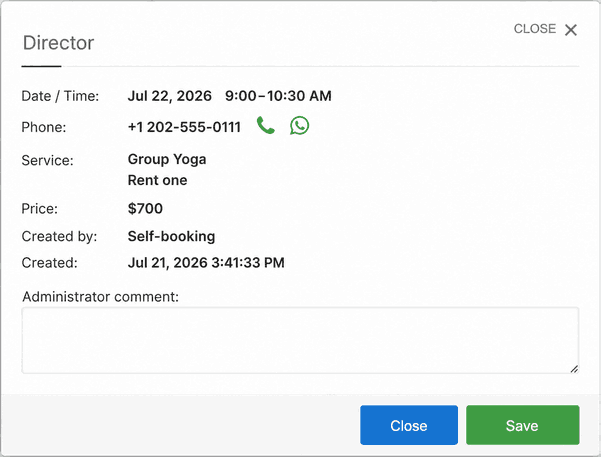
This window shows everything about the specific participant: class date and time, phone number with call and WhatsApp buttons, service and answers to additional fields (“Rent one” in our example), price, and who created the booking and when. “Self-booking” means that the client booked the class personally. You can also enter and save a note about the participant in the “Administrator comment” field. This lets the administrator know in advance how many yoga mats to prepare without calling every member of the group.
Booking a Client as an Administrator
An administrator books a client into a group in two steps. The order is important: first the client, then the class.
Step 1. In the search field above the calendar, begin typing the client’s name or phone number and select the client from the drop-down list. If this is a new client, click “New” and create a profile.
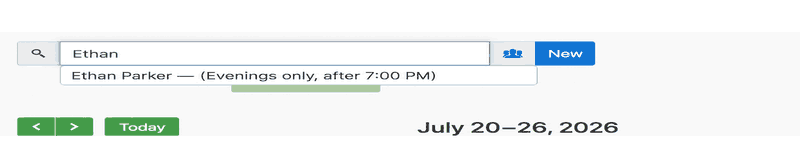
Step 2. Click the group class in the calendar and select “Book a client” from its menu. If the service has additional fields, the system asks you to complete them (see the section above); otherwise, the booking is created immediately. The counter increases, for example, from “3/20” to “4/20.” If you do this in the opposite order and open the class menu before selecting a client, the system displays a prompt: “First find a client using the search field, then select ‘Book a client’ from the class menu.” The result is visible in the “Participants” window shown above: all booked clients appear in a list.
Client Booking Through the Online Booking Page
Every calendar has a public online booking page — https://TimePlan.me/emilycarter in our example. Clients can see the weekly schedule, and the group class appears directly in the calendar with its remaining capacity: “Group Yoga (available: 16).”
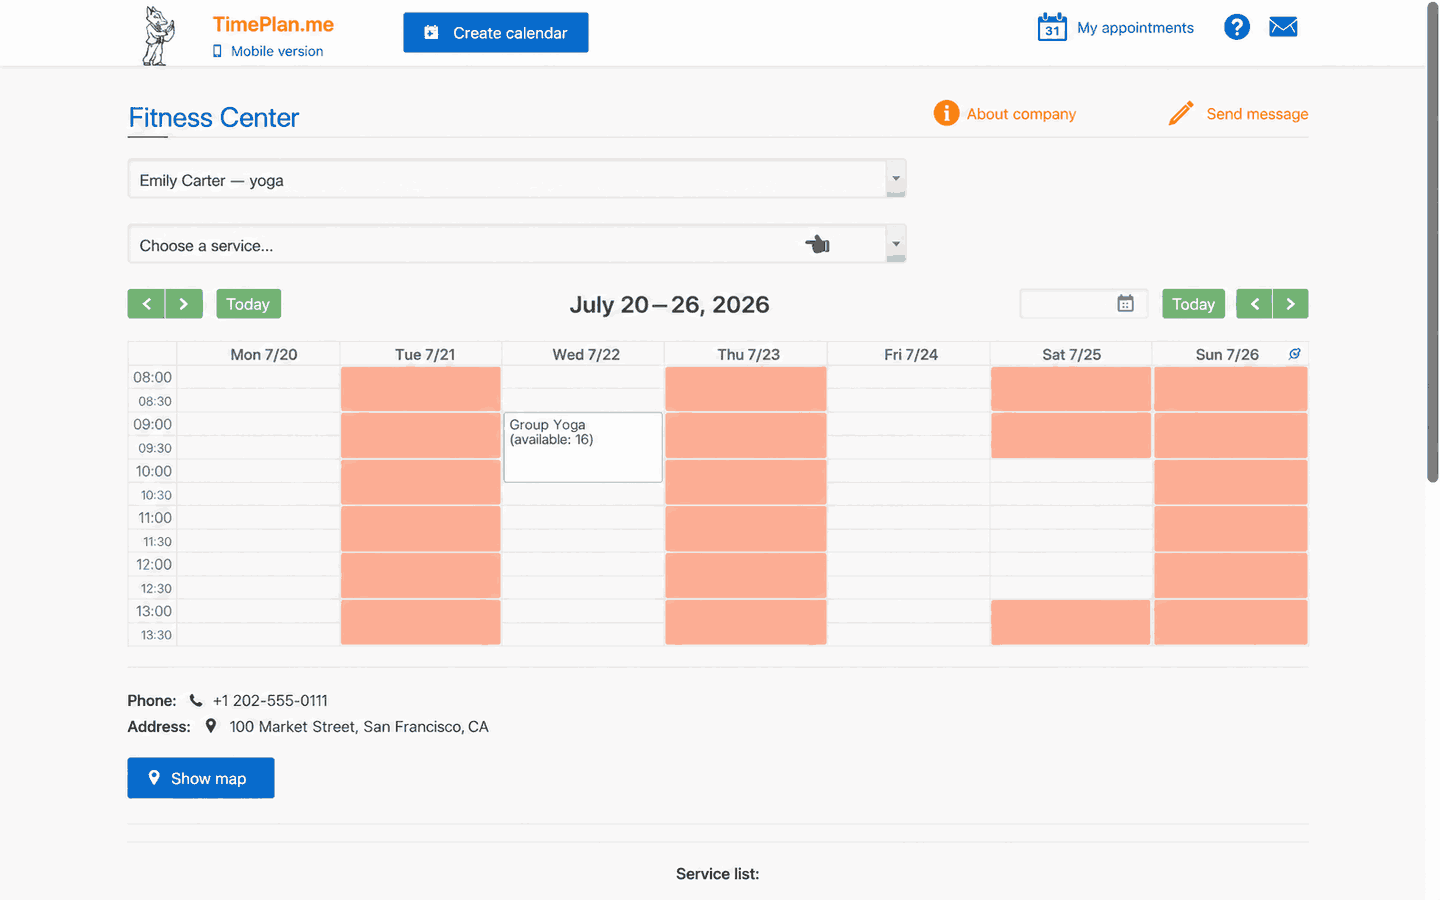
To book, the client simply clicks the class. A confirmation window opens with the date, time, and service name:
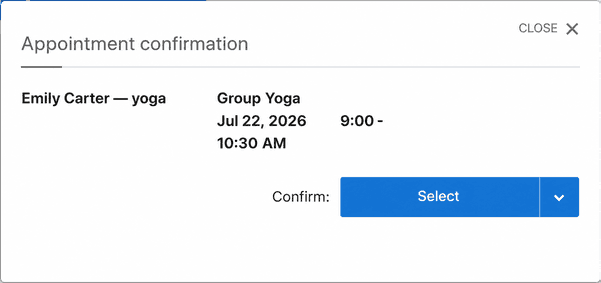
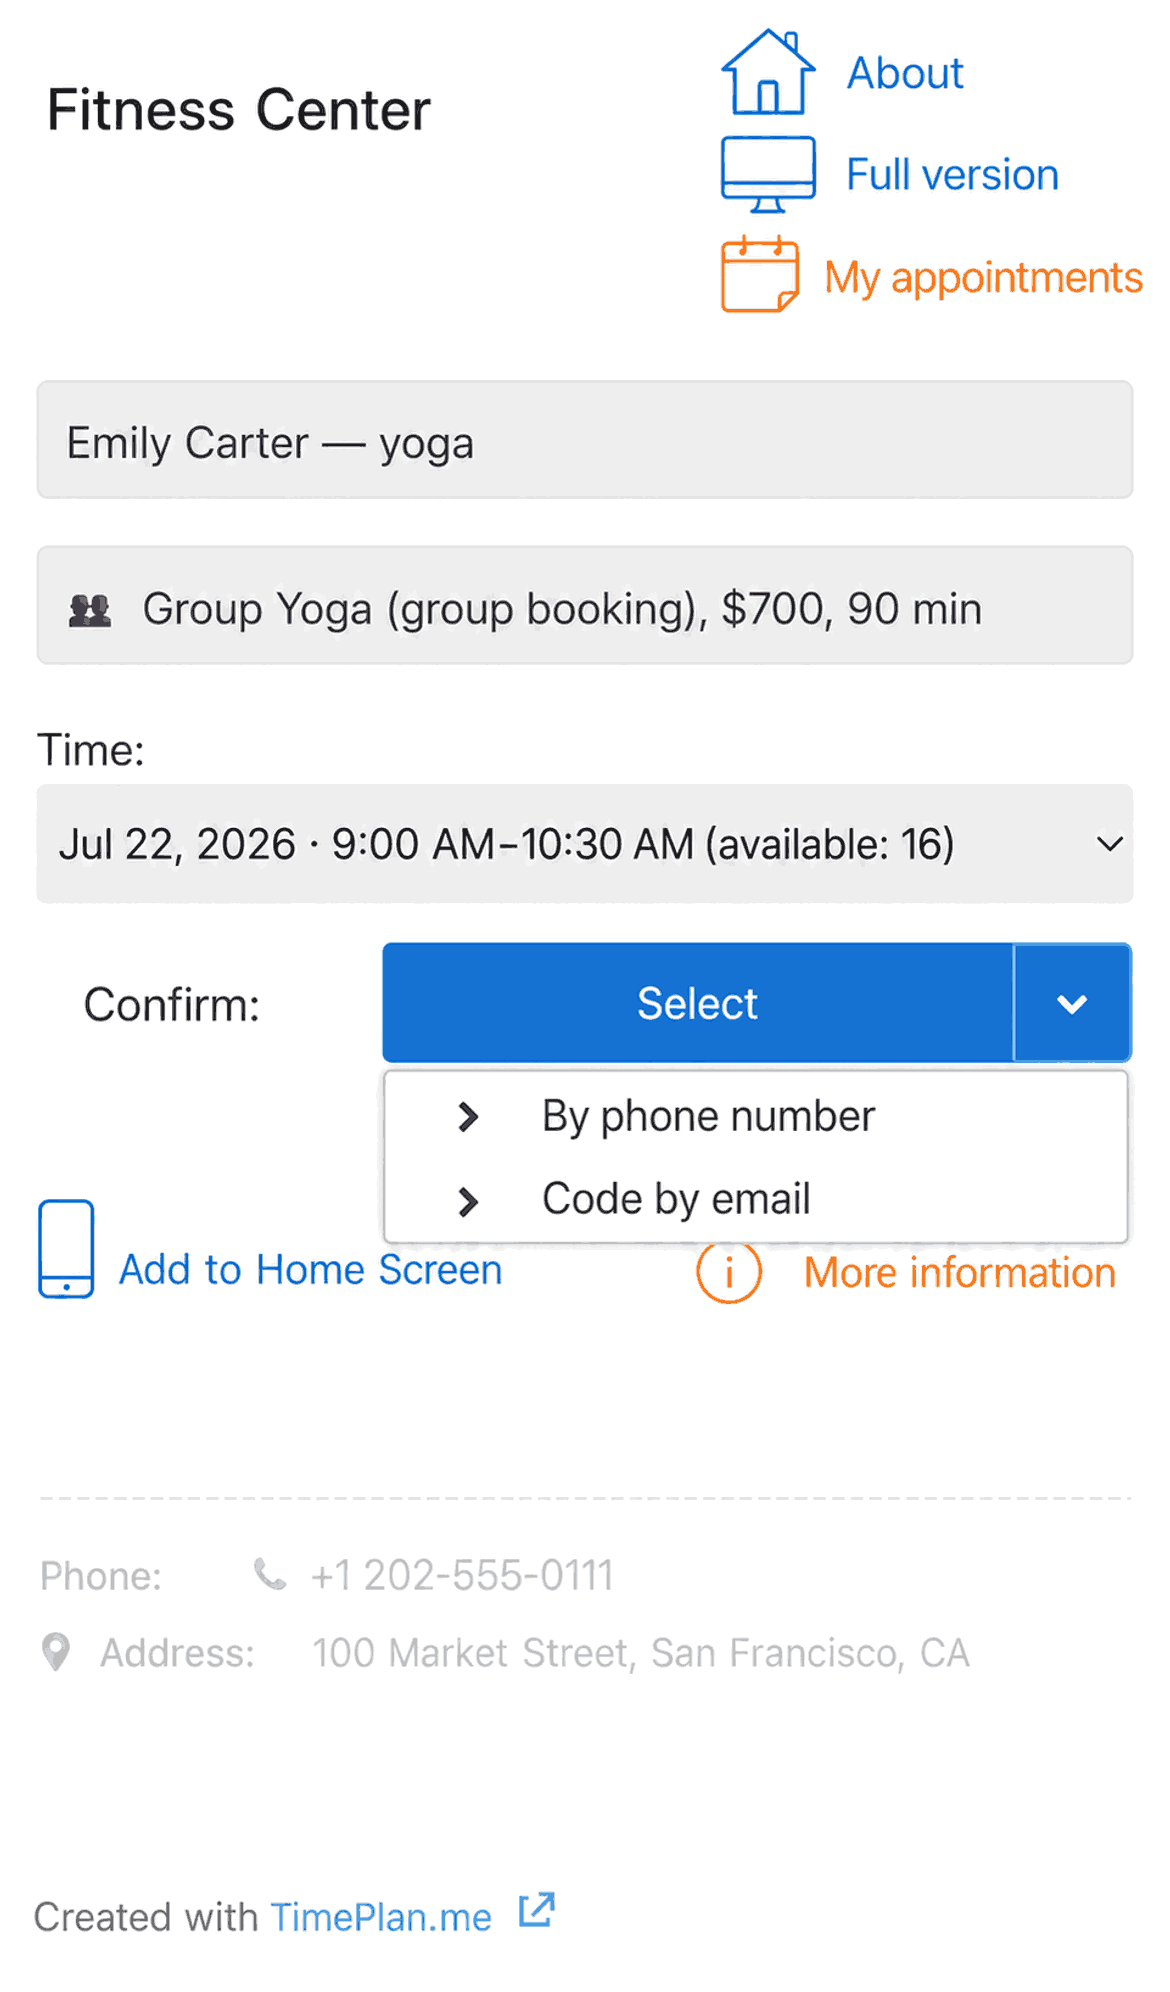
If additional fields have been configured for the service, they appear in the same window, like the “Yoga mat” field in the section above. Required fields are marked with an asterisk, and the booking cannot be created without an answer. The client then needs to confirm their identity. The “Select” button offers two options:
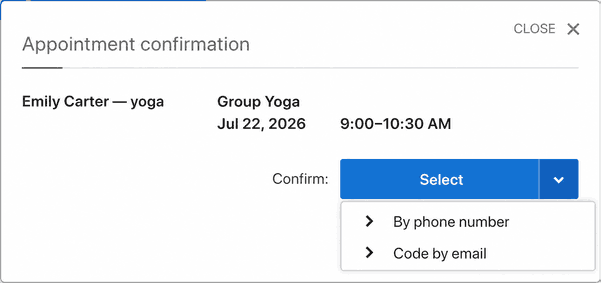
- By phone number — the client enters a phone number and confirms it with a code;
- Code by email — the same process, but the code is sent by email. After confirmation, the booking is created, the client receives a notification, and the number of available spots shown on the page decreases for all other visitors.
Note. To simplify the demonstration, the bookings were created by an administrator. That is why the screenshots in the “Participants” section show clients added through the company calendar. In actual use, a client independently confirms the booking with a code from an SMS message or email directly on the online booking page.
Using the Booking Page on a Mobile Device
On a phone, the booking page automatically opens in its mobile version at an address such as https://TimePlan.me/m/emilycarter. Direct links to group classes also open this version.
The booking process is the same, but the interface is simplified for a phone screen.
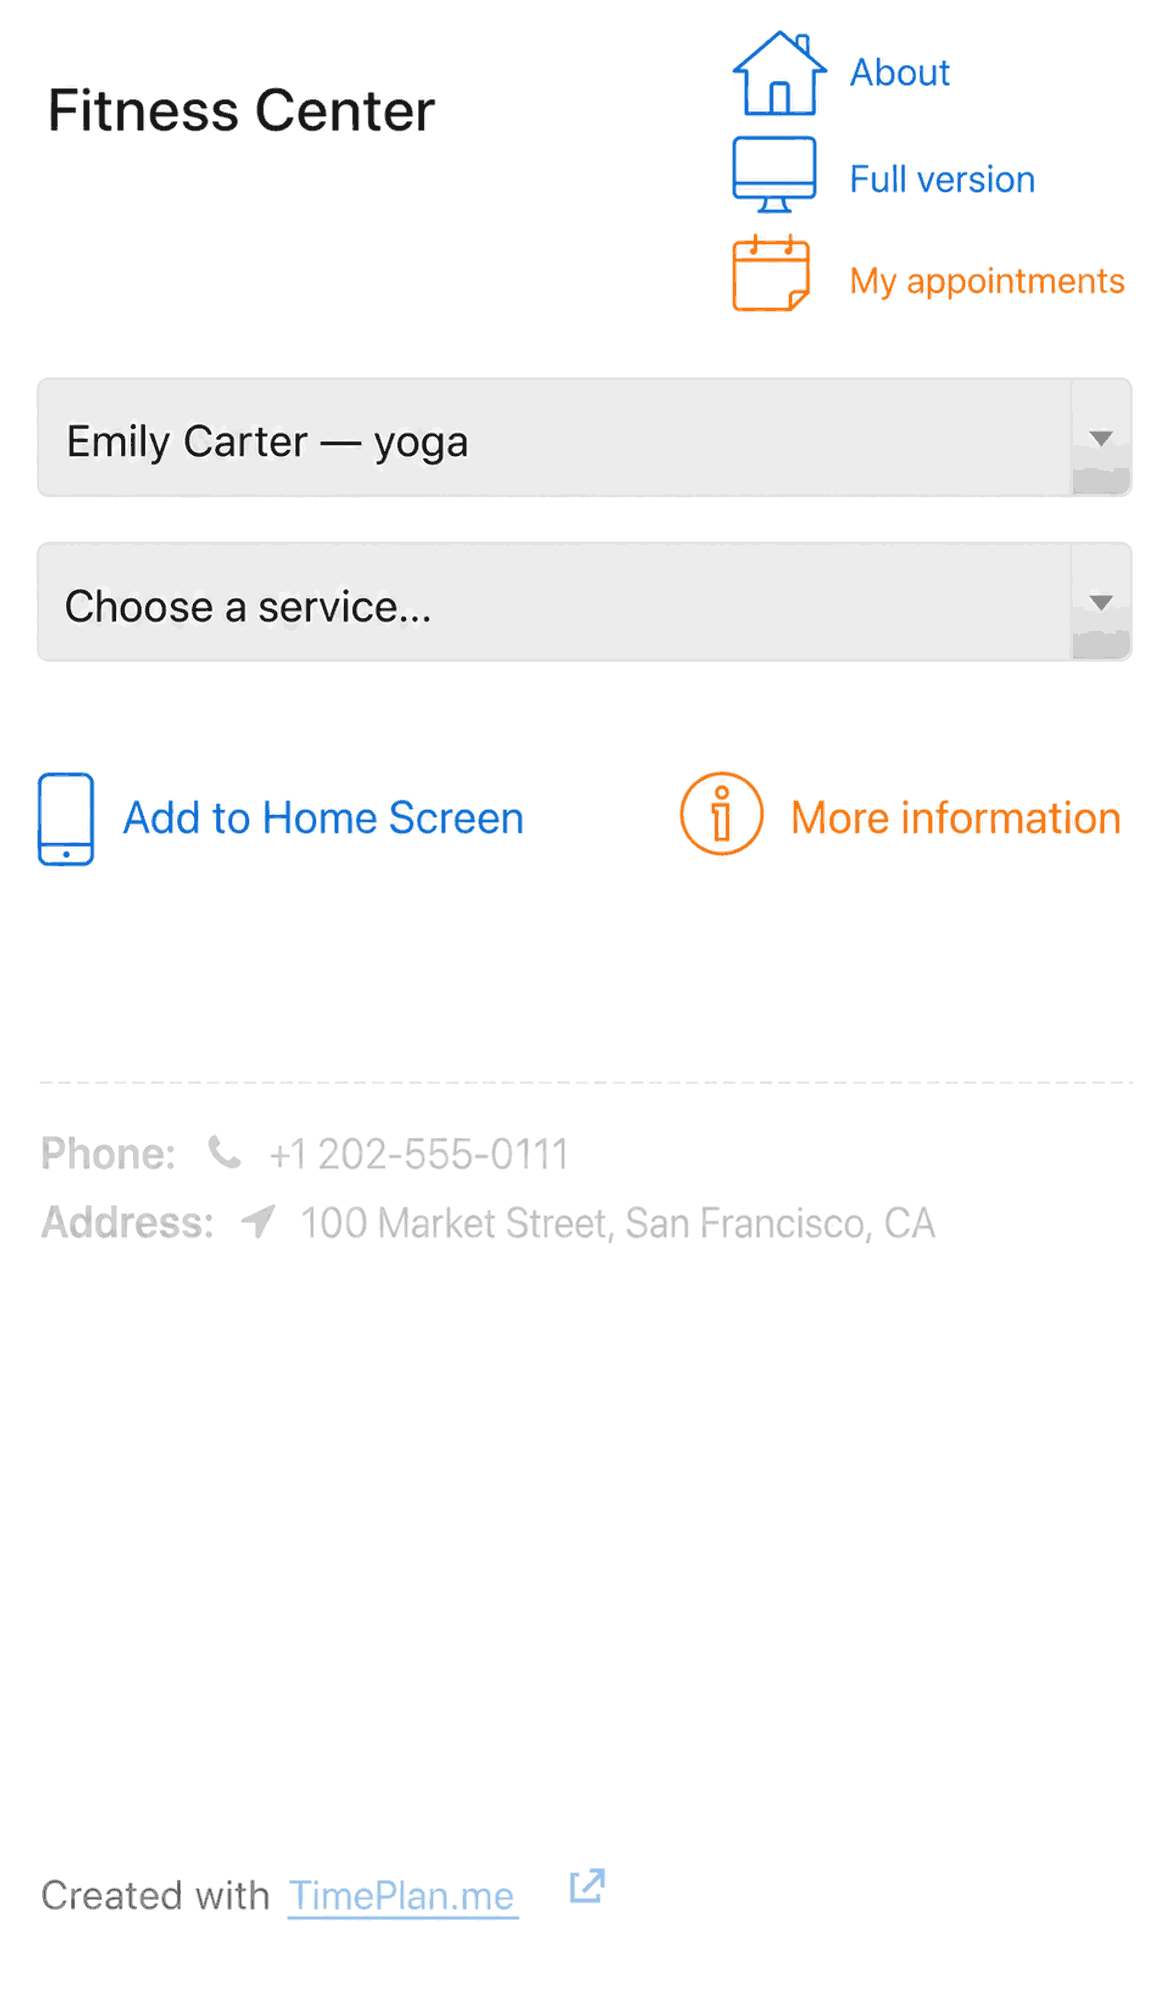
1. Opening the page. The client sees the company name, specialist selector, and list of services. A group service is marked with the 👥 icon and the “(group booking)” label:
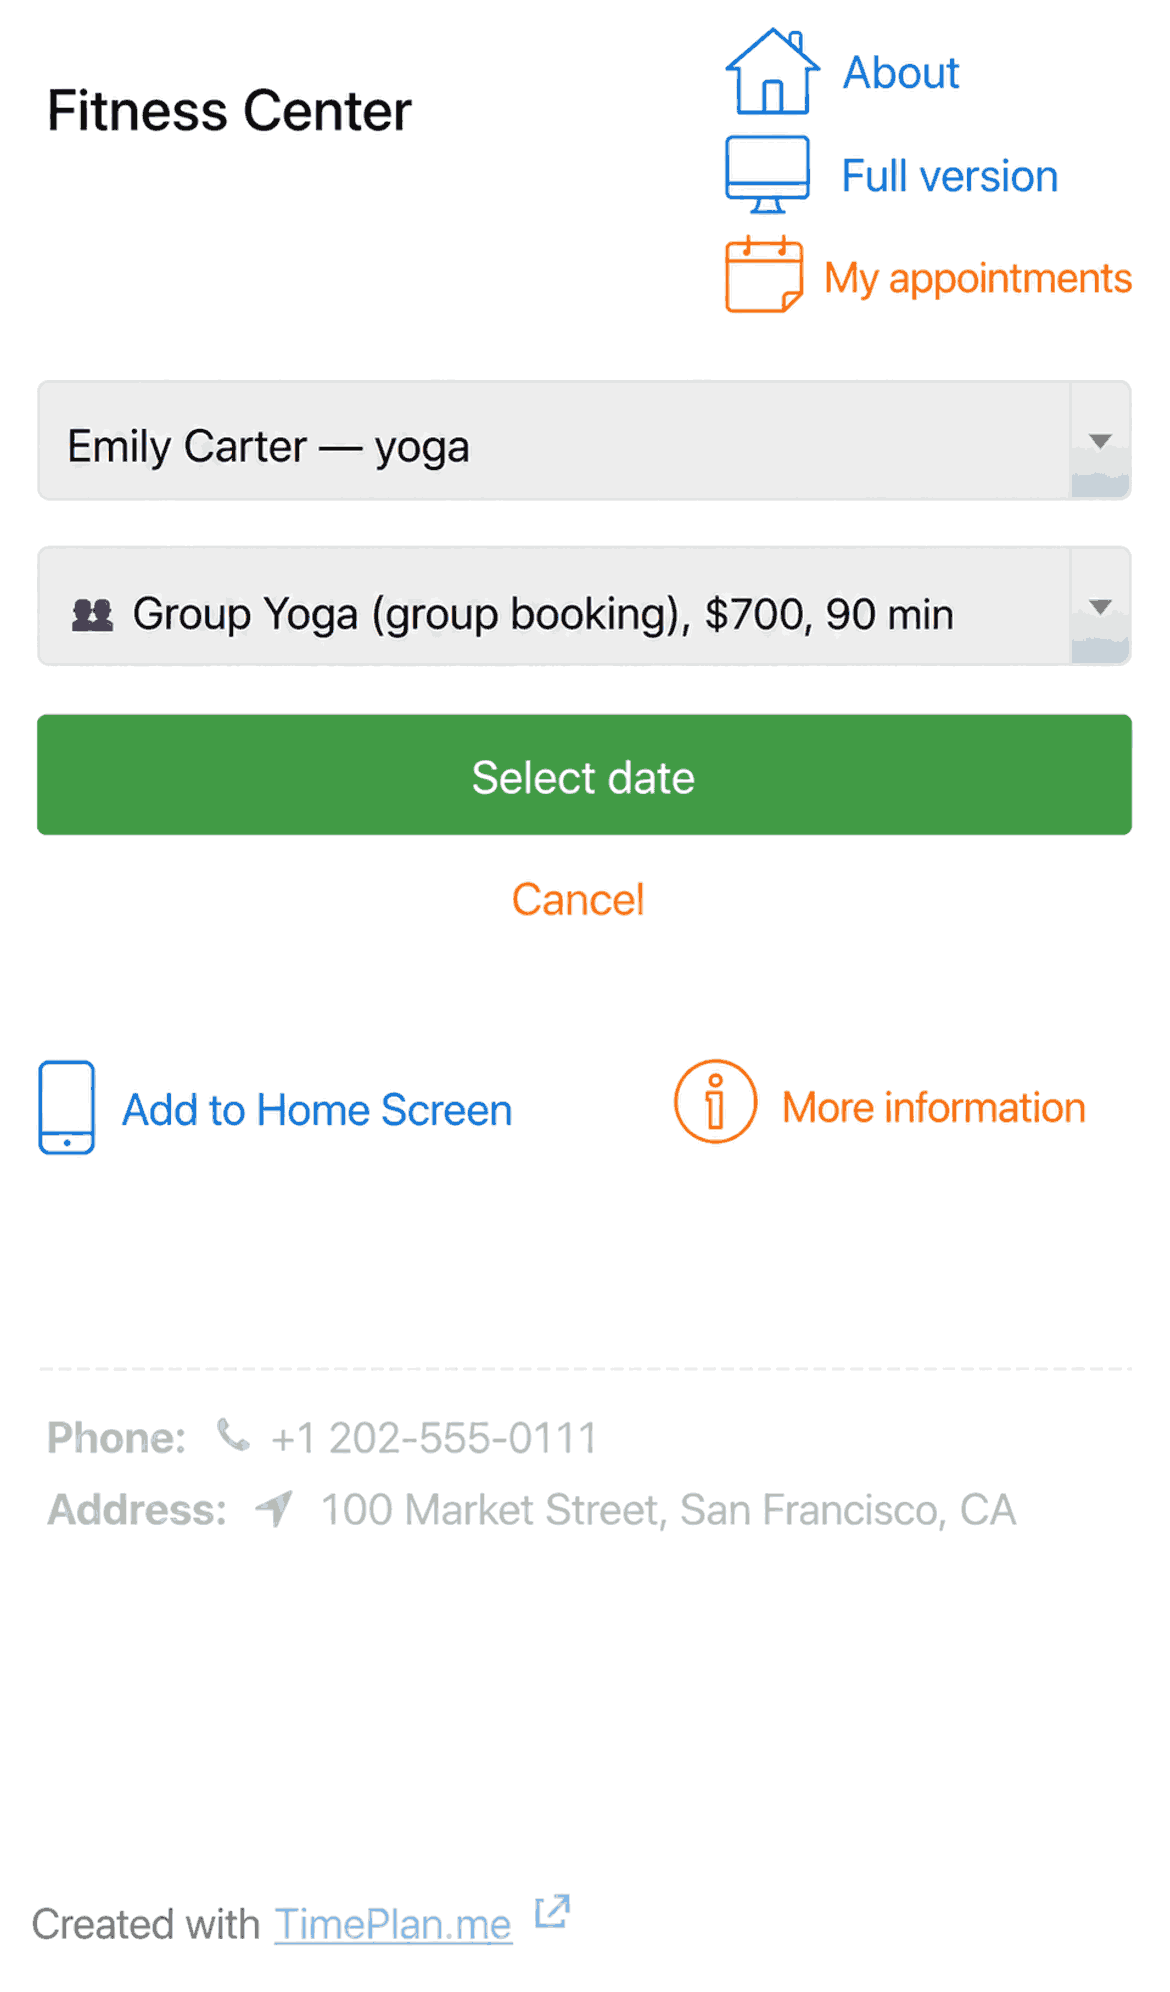
2. Selecting a class. After selecting the “Group Yoga” service, the “Select date” button appears:
3. Viewing the information. The system shows the nearest class with its date, time, and available spots: “Jul 22, 2026 · 9:00 AM–10:30 AM (available: 16).” If there are several classes, the client selects one from the list. If the self-booking page was opened using a direct link, the time for which that class link was generated is selected automatically:
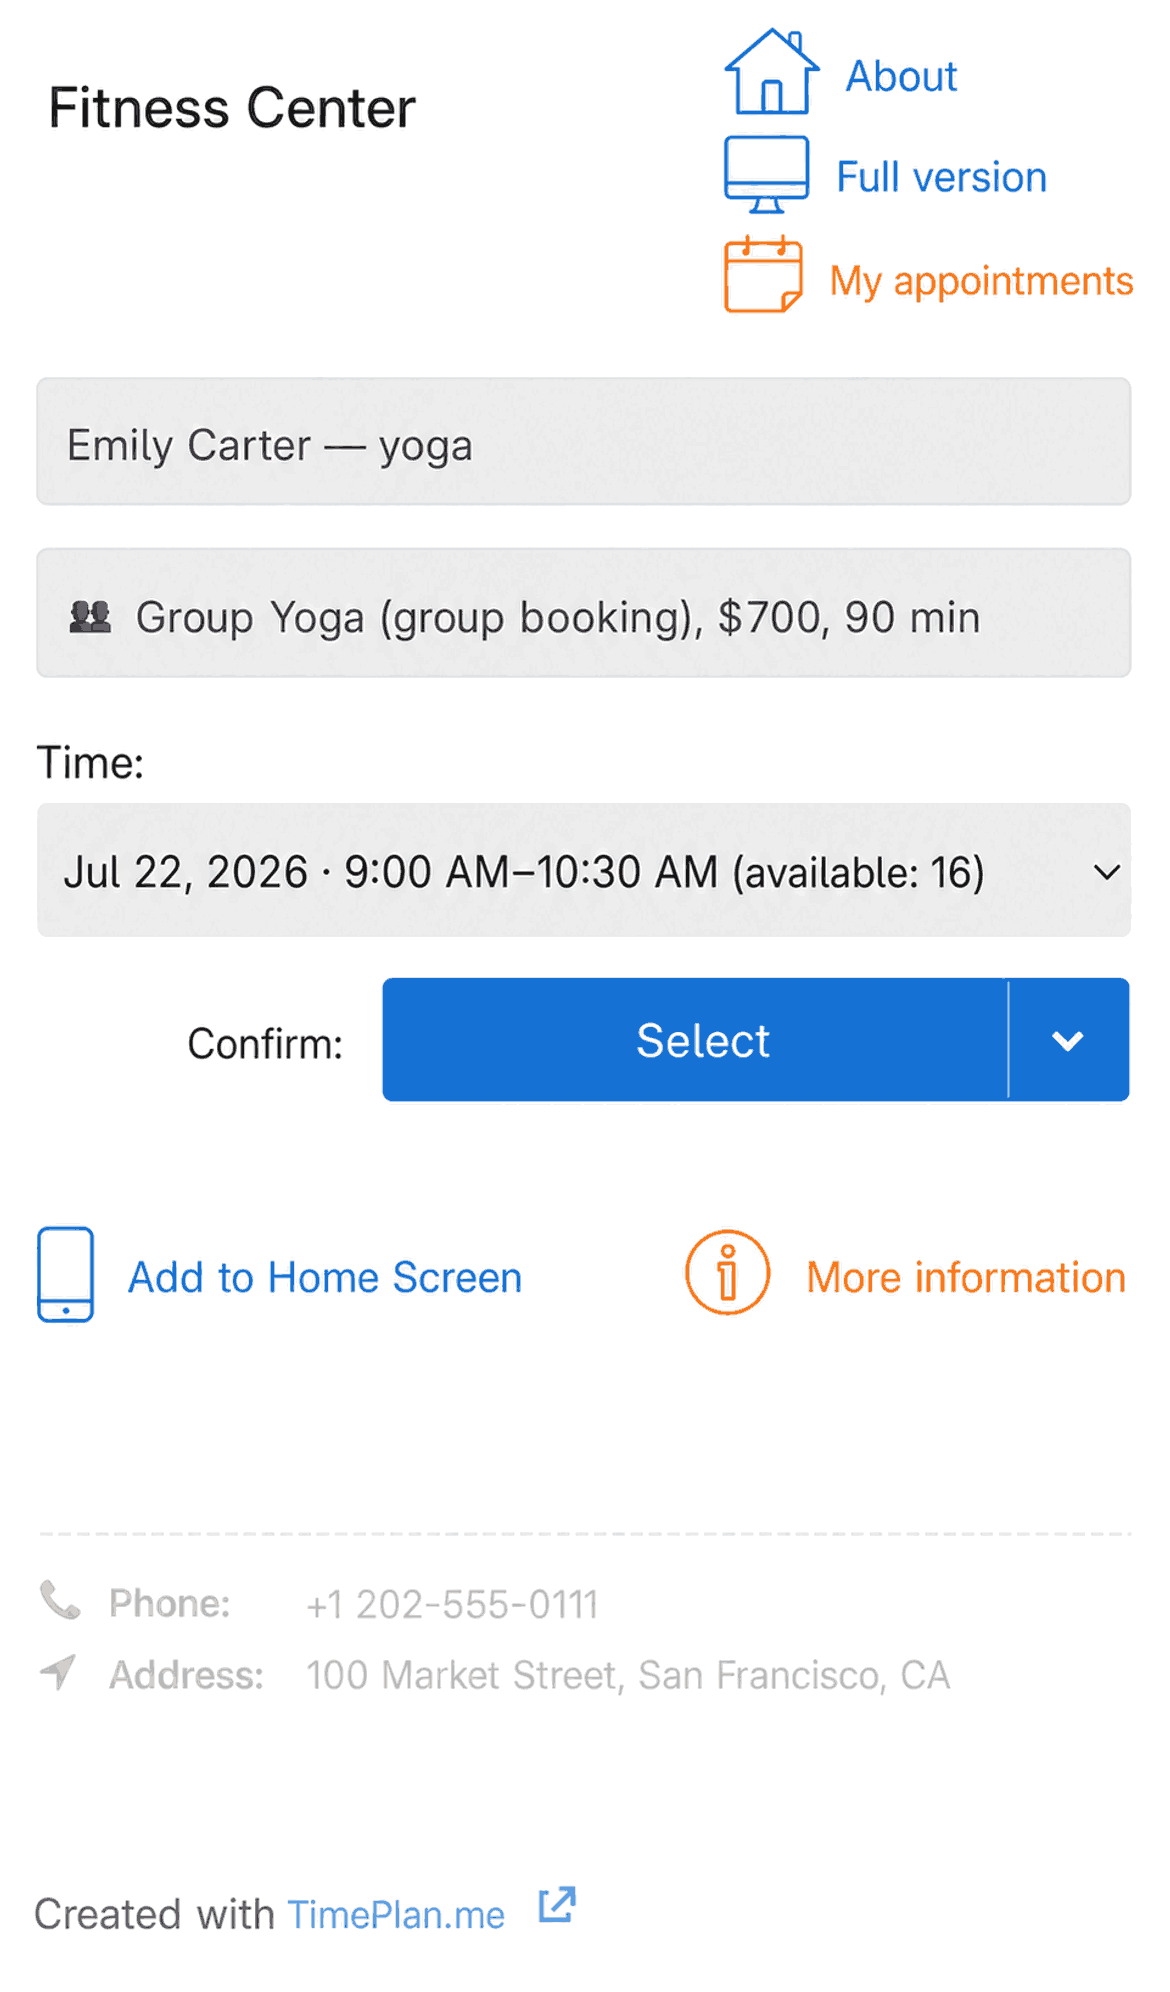
4. Booking. The client only needs to confirm the booking, just as on desktop, using a phone number or a code sent by email:
After confirmation, the client will see the booking on the same page under “My appointments.”
Key Points
How do I make a service a group service?
Select “Group booking” when creating the service.
How many people can book the same time?
No more than the “Maximum participants” value specified in the service settings.
Who creates a class in the schedule?
The administrator creates it using “Group” mode in the calendar. If necessary, a separate setting can allow clients to create group classes.
How do I book a client manually?
Find the client using the search field, then open the class menu and click “Book a client.”
How does a client book independently?
Through the online booking page: the client selects a class and confirms the booking by phone or email.
Can clients see available spots?
Yes, if the display of remaining available spots is enabled in the service settings.
How do I send a link to a specific class?
Open the class menu and select “Direct booking link.”
How do I collect additional information about participants?
Configure additional fields for the service. Answers are available in the “Participants” window by clicking ⓘ next to the required person.